4 min to read
Unreal Engine 5 How to create a renaming tool for Unreal Engine 5 in blueprints (search and replace)
Learn how to create asset action utilities using blueprints
What’s an Asset Action Utility?
Scripted actions as the official documentation states, are Editor Utility Blueprints that you launch in the Unreal Editor based on selection in Content Browser or in actors selection in level or Outliner.
With this said, we can image this is a very helpful way of building tools for managing assets and actors quickly using only blueprints. Althought you can build them using c++ too, as I will explain in a next post.
Scripted actions give us support for getting the assets or actors selected at the time you run the action and we can use them for any logic inside the blueprint graph.
Renaming Tool in blueprints
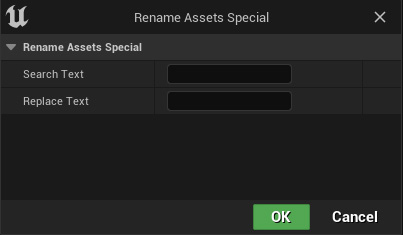
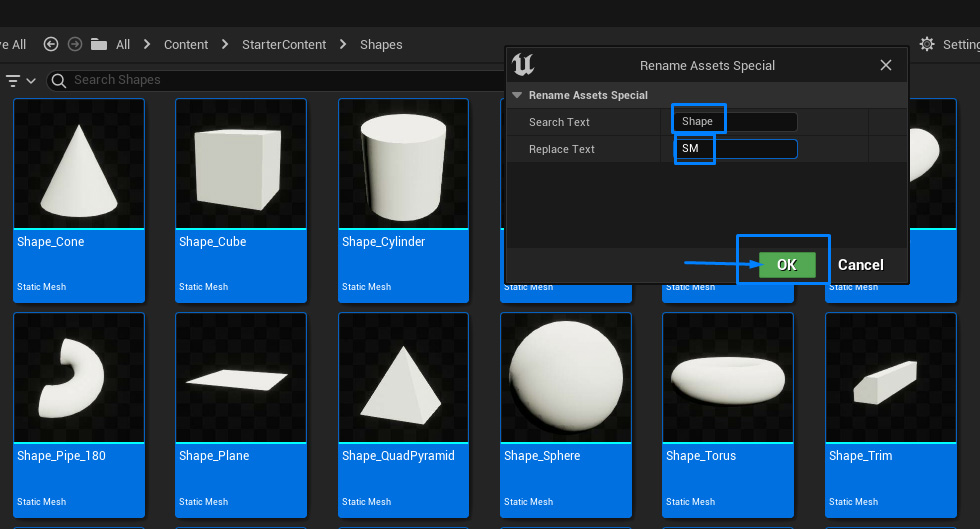
We are going to create a renaming tool that searches for a selected string in selected assets names in Content Browser and replaces that string for another one of our selection. We’ll be using Unreal Engine 5.2 but this procedure is tested in every later versions from 5.0. The tool UI will look like this:
Create the Asset Action Utility in Blueprints
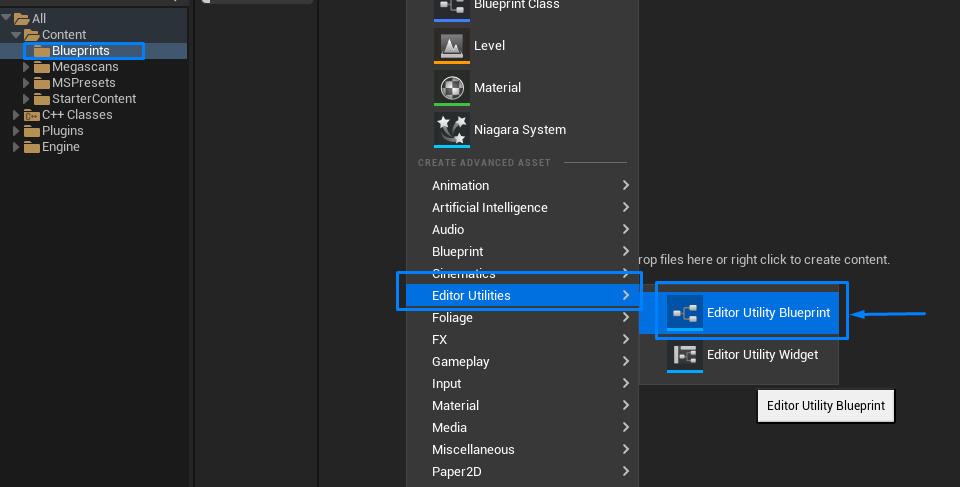
For creating the Asset Action Utility Blueprint, I’ve created a folder called Blueprints and right clicking on it, I’ve selected Editor Utility Blueprint in the Editor Utilities section in the displayed menu.
I’ve called it EUB_ContentBrowserTools as this name is only for sorting purposes, our actions names will be the names of the functions we’ll be creating inside the EUB. We open the blueprint and we click on Add button at the top of MyBlueprint tab and select Function.
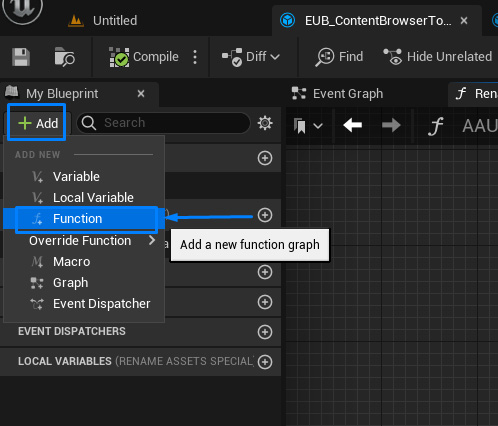
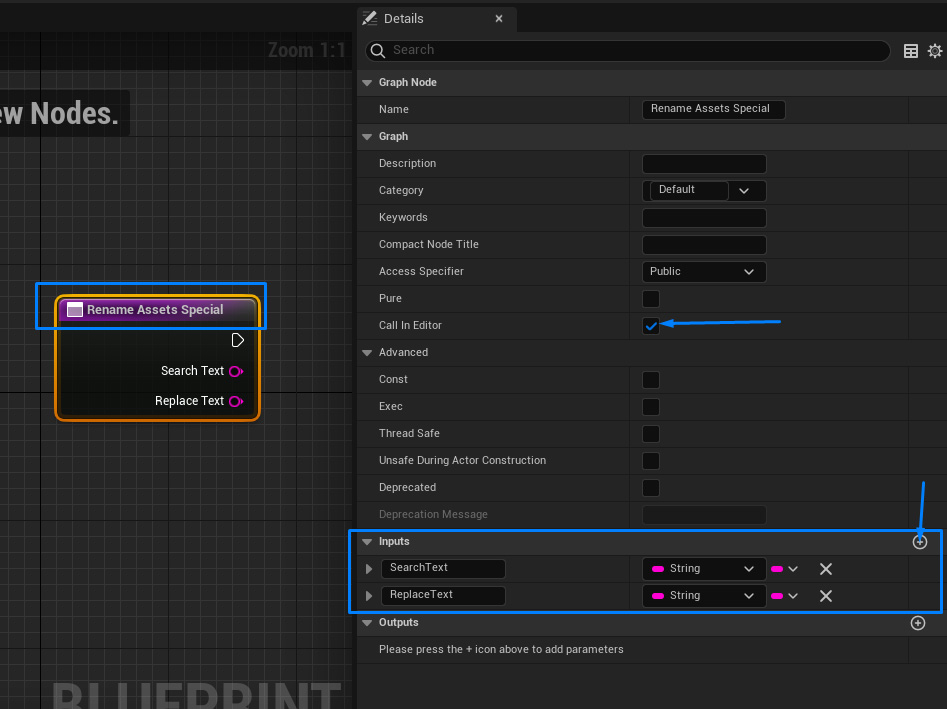
I called this function RenameAssetsSpecial because, as I explained before, this will be the displayed name for the action and the ui window title, and added two String inputs to the function; one called SearchText, the other one called ReplaceText. These inputs will give us the values we input in the ui after we click in “Ok” button for managing in the blueprint node graph.
Function and inputs names must be written in UpperCamelCase convention, without blank spaces, as Unreal engine will interpret them and will place the blank spaces in ui displayed values for us.
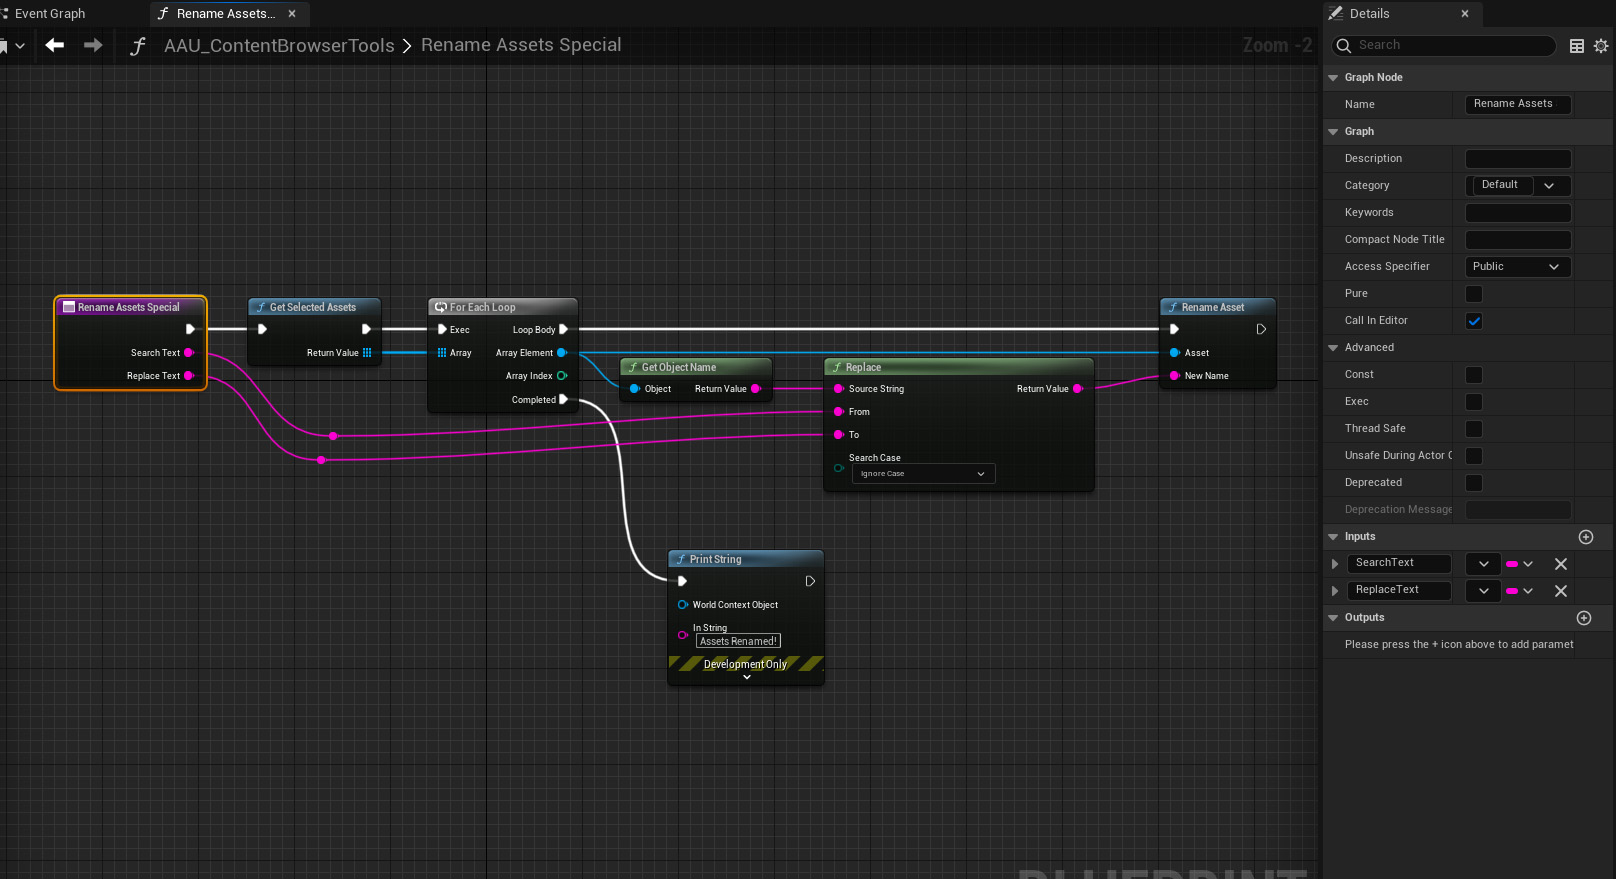
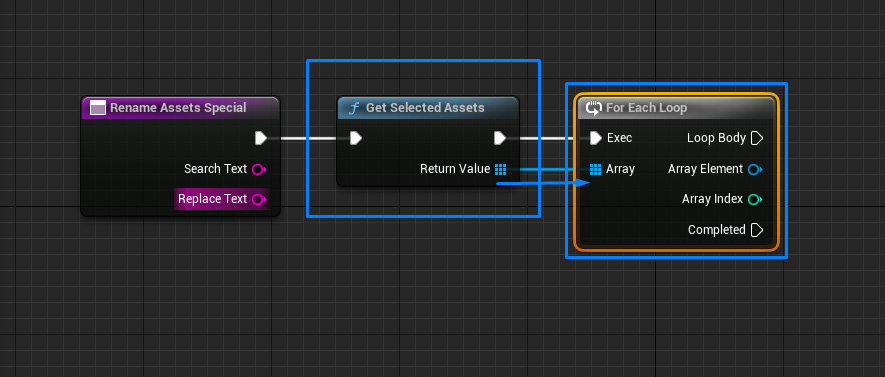
Then, I added the Get Selected Assets node and linked to a For Each Loop fed by the Return Value of the Get Selected Assets node. The graph will be making an operation in every asset in selection.
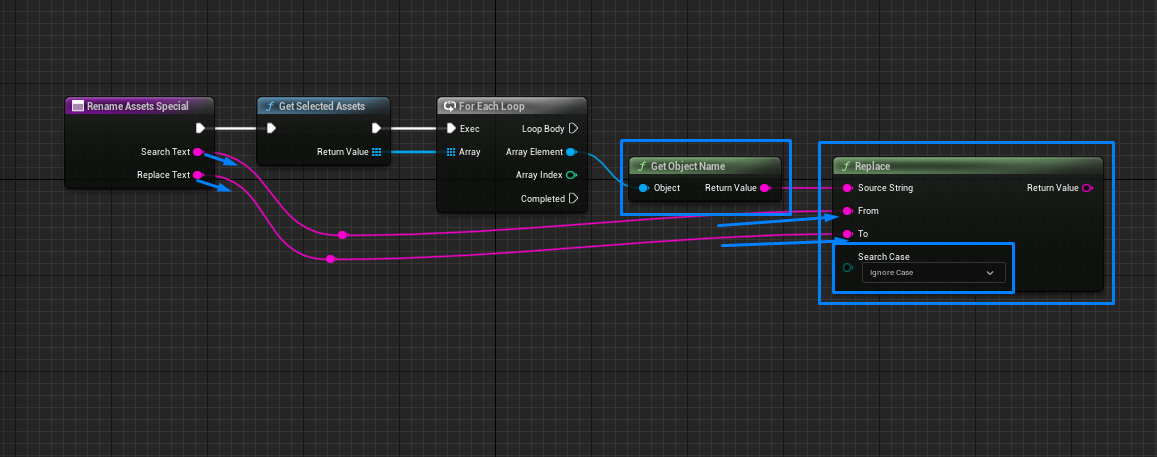
We got the name of every asset using the Get Object Name node having the Array Element output of the For Each Loop as Object input and link the Return Value to the Source String input of a Replace node. We want to replace the SearchText value by the ReplaceText value in every asset in the selection, if it exists, and this Replace node is the best suitable for it as it will look for the value in From input and replace by the value of To input, only if the From value exists.
So, I linked the SearchText and ReplaceText inputs from the Function to the From and To inputs of the Replace node and keep ignore case as value in Search Case input enumerator. We are almost there!
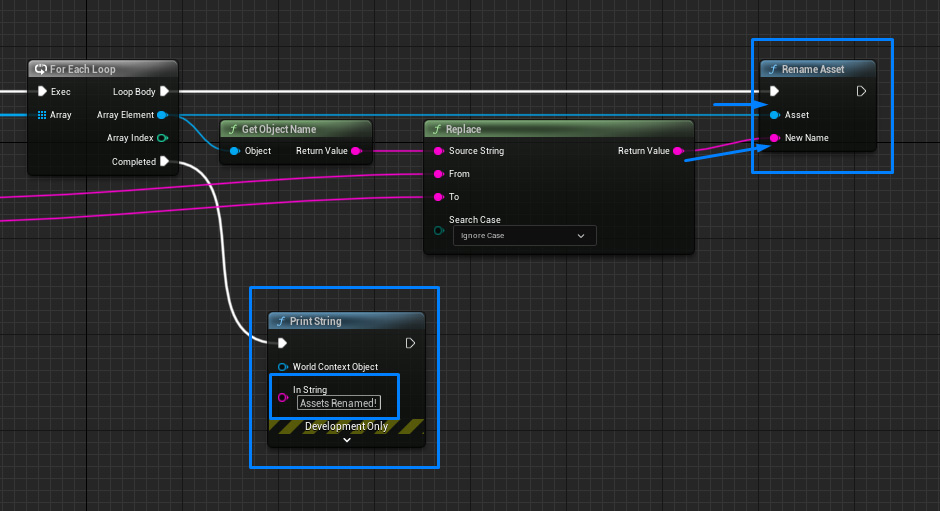
Finally, I linked the Loop Body execution output of the For Each Loop to the execution input of a Rename Asset node, which inputs will be the Array Element output of the For Each Loop node as Asset and the Return Value of the Replace node as New Name inputs.
I added a Print String node with an “Assets Renamed!” message for being displayed after the loop has finished. Click on Compile and Save. We have our graph ready!

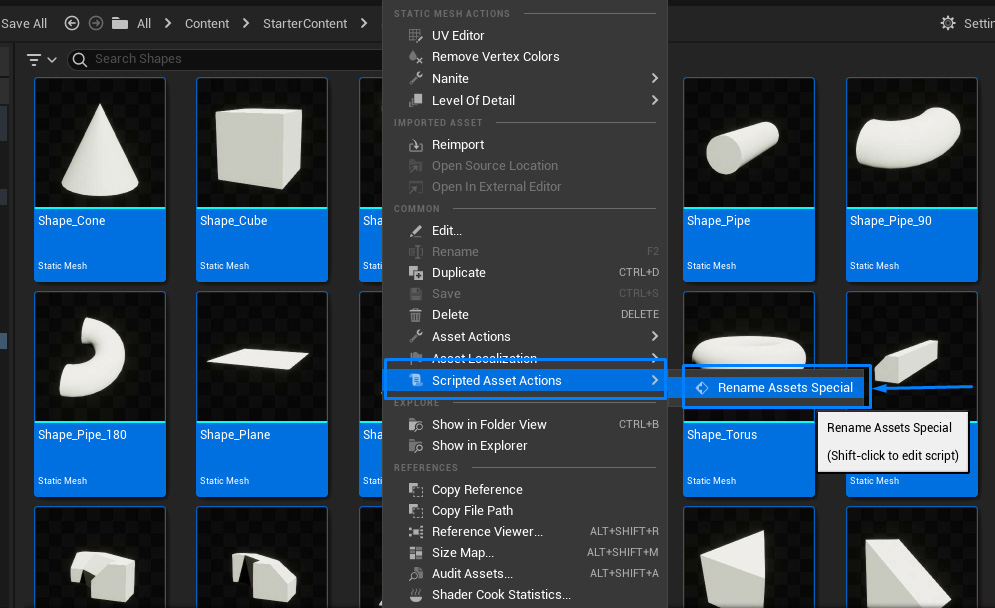
It’s time to test it in any asset in UE5 Content Browser. For that, we select some assets in Content Browser and right click on them, under the menu Scripted Asset Actions you will find the menu Rename Assets Special, and by clicking on it the before mentioned ui will be displayed in screen.
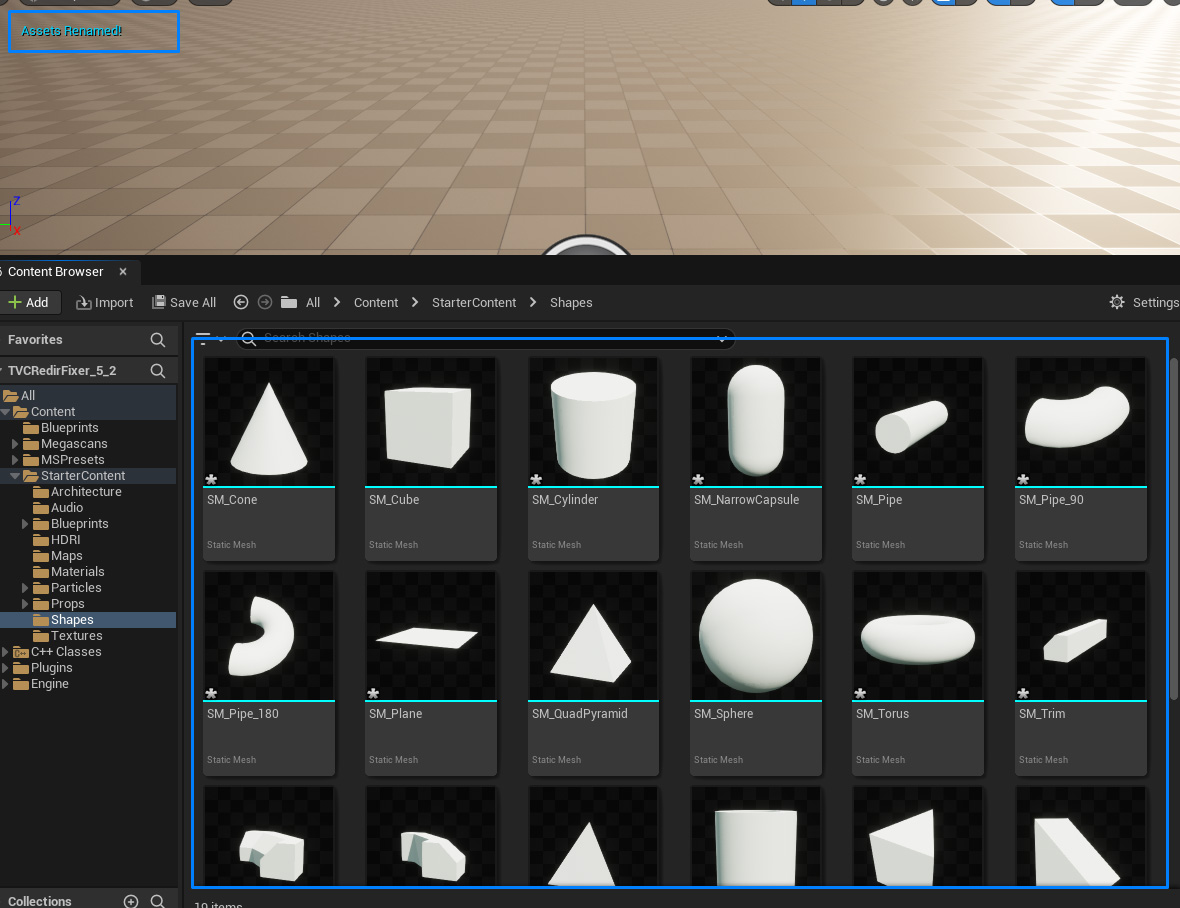
We can fill Search Text and Replace Text text fields as we need and click “Ok” button to execute our scripted action and after the operation has finished we’ll see the message “Assets Renamed!” in our Level Editor window.
I hope this will help you as starting point for creating your own Asset Action Utilities in Unreal Engine 5 Blueprints.
